Table of contents
- 1 AI Stock Photo Builder Review
Your Shortcut to Stunning AI Photos?
- 1.1 What Is AI Stock Photo Builder?
- 1.2 My Journey with AI Stock Photo Builder
- 1.3 Pros and Cons of AI Stock Photo Builder
- 1.4 Tony’s Tips for Getting the Best Results
- 1.5 Has It Been Worth It for Me?
- 1.6 Final Verdict: Is AI Stock Photo Builder Worth Investing In?
- 1.7 AI Stock Photo Builder: Pricing And OTOs
- 1.8 Conclusion & Extra Bonuses
AI Stock Photo Builder Review
Your Shortcut to Stunning AI Photos?
Hey there, I’m Tony, a freelance graphic designer and part-time blogger who’s always on the hunt for tools to make my life easier. If you’re like me, you know the struggle of finding the perfect image for a project without spending hours scouring stock photo sites or blowing your budget.
A few months ago, I stumbled across the AI Stock Photo Builder by Max Rylski, and let me tell you, it’s been a game-changer. In this review, I’m going to walk you through what this tool is, how it’s worked for me, its pros and cons, and whether it’s worth your investment. Buckle up, because I’ve got a lot to share!
What Is AI Stock Photo Builder?
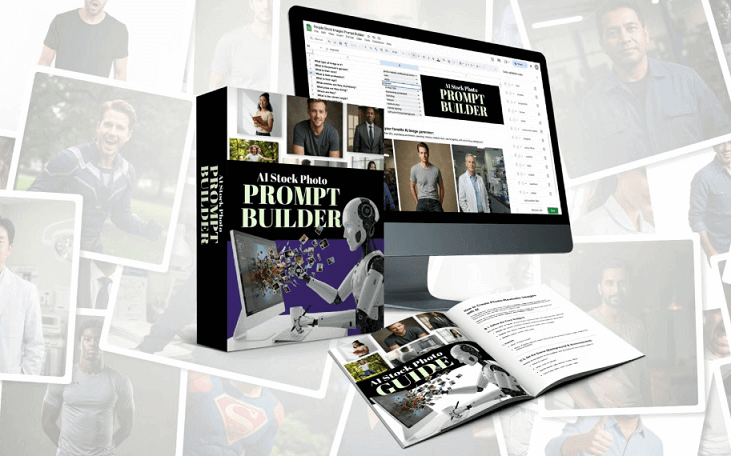
The AI Stock Photo Builder is a kit designed to help you create photo-realistic stock images using a free AI image generation tool, paired with a super handy Prompt Builder. Created by Max Rylski, this product promises to eliminate the need for expensive stock photo subscriptions or complex AI tools like Midjourney or DALL-E. The kit includes:
+ A Free AI Image Tool: Max points you to a free AI tool (no credits needed!) that rivals paid platforms in quality.
+ AI Stock Photo Guide: A detailed guide on crafting prompts for photo-realistic images, covering everything from camera angles to lighting.
+ Prompt Builder Tool: A point-and-click interface with 11 customizable drop-down menus to create tailored prompts in seconds.
+ PLR License: This lets you sell the images, prompts, or even the Prompt Builder itself for profit.
The pitch is simple: point, click, and create custom images for any project—whether it’s a blog post, social media ad, or client presentation—without needing design skills or a big budget.
My Journey with AI Stock Photo Builder
I’ve been using this tool for about three months now, mostly for my blog and a few client projects. As a designer, I’m picky about visuals, and I was skeptical about a “free” AI tool matching the quality of paid ones. But after burning through stock photo subscriptions and getting frustrated with generic images, I decided to give it a shot for the low one-time price of $17.
♦ FIRST IMPRESSIONS
The setup was a breeze. The AI Stock Photo Guide is clear, even for someone like me who’s not a pro at writing AI prompts. It breaks down how to structure prompts, what words to use, and how to tweak things like lighting or camera angles. The Prompt Builder, though, is where the magic happens. It’s like a cheat code for AI image generation—you just pick options from drop-down menus (like profession, emotion, or background), add any extra details, and boom, you’ve got a prompt ready to go.
I started by testing it for a blog post about remote work. I used the Prompt Builder to create a prompt for “a young woman in her 20s, working on a laptop in a cozy coffee shop, natural lighting, medium shot.” I copied the prompt into the free AI tool Max recommends, and within seconds, I had four high-quality images. One of them was exactly what I needed—no stock photo site could’ve delivered something that specific.
♦ HOW IT’S HELPED MY WORK
Over the past few months, this tool has saved me countless hours and dollars. Here’s how it’s made a difference:
+ Blog Posts: My blog now has unique, eye-catching visuals that align perfectly with my content. For a post about fitness, I created images of athletes in various poses, like “a bodybuilder lifting weights in a neon-lit gym.” These images pop and keep readers engaged, which has noticeably reduced my bounce rate.
+ Client Projects: I’ve used the tool to create niche-specific images for clients in industries like real estate and e-commerce. For example, I made a “cinematic movie still” of a luxury home for a realtor’s website, and they loved how professional it looked.
+ Social Media: The ability to create transparent PNGs has been a lifesaver for Instagram posts. I made a cutout of a chef holding a pizza for a restaurant client, layered it over a custom background, and it looked like a pro photoshoot.
+ Side Hustle: The PLR license is a nice bonus. I’ve sold a few custom prompts and images to other bloggers, which has already covered the cost of the tool.
♦ WHAT’S SPECIAL ABOUT IT?
The standout feature is the Prompt Builder. It takes the guesswork out of AI image creation. Instead of struggling to write a detailed prompt from scratch, I just select options like “portrait shot,” “happy emotion,” or “vintage Polaroid style.” The tool also lets me customize the menus, so I added specific niches like “yoga instructor” or “futuristic cityscape” for my projects.
Another big win is the free AI tool. I was blown away by its quality—Max wasn’t kidding when he said it rivals paid tools. I’ve created hundreds of images without hitting any credit limits, which is unheard of for free tools. Plus, the prompts work with other AI platforms, so I’ve tested them in Midjourney for comparison, and the results were just as good.
Pros and Cons of AI Stock Photo Builder
No tool is perfect, so here’s my honest take on what I love and what could be better.
♦ PROS:
- Time-Saver: The Prompt Builder makes image creation fast and intuitive. I can generate a perfect image in under a minute.
- Cost-Effective: For a one-time $17 payment, you get unlimited image creation with a free tool. No subscriptions, no credit limits.
- High-Quality Results: The images are crisp, photo-realistic, and customizable to the smallest details (like ethnicity, age, or lighting).
- Versatility: You can create any type of image—business photos, portraits, cinematic stills, retro vibes, you name it.
- PLR License: The ability to sell images or prompts is a great way to turn this into a side hustle.
- Beginner-Friendly: No tech or design skills needed. The guide and Prompt Builder make it accessible for anyone.
♦ CONS:
- Learning Curve: While the Prompt Builder is easy, getting the perfect image sometimes requires tweaking prompts or experimenting with variations. It took me a few tries to nail down specific styles.
- Free Tool Limitations: The free AI tool is fantastic, but it has fewer features than paid platforms like Midjourney. For example, it doesn’t offer advanced editing options within the tool itself.
- Customization Time: Adding your own options to the Prompt Builder (like new professions or poses) is simple but can be time-consuming if you’re creating a lot of custom menus.
- Occasional AI Quirks: Like most AI tools, you might get odd results (e.g., a “double laptop” glitch in one of my images). These are rare but require a quick review before using.
Tony’s Tips for Getting the Best Results
After months of playing with this tool, here are my top tips to maximize your experience:
+ Be Specific in the Prompt Builder: The more details you add (e.g., “woman in a red dress, sunset lighting, beach background”), the better the results. Don’t just rely on the drop-downs—type in extra props or text if needed.
+ Experiment with Variations: If the first set of images isn’t quite right, tweak the prompt slightly (e.g., change “happy” to “excited” or adjust the camera angle) and try again.
+ Check for AI Glitches: Always review the images for small errors, like weird hands or objects. The tool Max recommends is great with hands, but it’s not perfect every time.
+ Optimize for SEO: When using images on your blog, add SEO-optimized alt text (e.g., “AI-generated photo of a chef in a modern kitchen”). This boosts your post’s visibility on search engines.
+ Leverage the PLR License: If you’re entrepreneurial, create niche-specific prompts (e.g., for fitness or travel bloggers) and sell them on platforms like Etsy or Fiverr.
Has It Been Worth It for Me?
Absolutely. The AI Stock Photo Builder has cut my image sourcing time in half and saved me hundreds of dollars on stock photo subscriptions. My blog posts look more professional, and my clients are thrilled with the custom visuals. The PLR license has even opened up a small side income stream, which I wasn’t expecting. Sure, there’s a slight learning curve, but once you get the hang of it, it’s smooth sailing.
Final Verdict: Is AI Stock Photo Builder Worth Investing In?
At just $17 for a one-time payment, AI Stock Photo Builder is a steal for anyone who needs high-quality, custom images without breaking the bank. It’s perfect for bloggers, freelancers, small business owners, or anyone looking to ditch generic stock photos.
The Prompt Builder and free AI tool make it accessible for beginners, while the PLR license adds value for those who want to monetize their creations. Yes, it requires some experimentation to get perfect results, and the free tool lacks some advanced features, but for the price, it’s hard to beat.
If you’re tired of spending hours searching for images or paying for subscriptions, I’d say give it a try. With the 30-day money-back guarantee, you’ve got nothing to lose. For me, it’s been a no-brainer investment that’s paid off in both time and quality.
AI Stock Photo Builder: Pricing And OTOs
- AI Stock Photo Builder FE ($17 One Time)
- OTO 1: AI Art Builder ($27 One Time)
- OTO 2: AI Fantasy Character Prompt Builder ($27 One Time)
- OTO 3: AI Interior Background Builder ($27 One Time)
- OTO 4: AI Landscape Builder ($27 One Time)
/w=1920,quality=90,fit=scale-down)
Conclusion & Extra Bonuses
Thank you for taking the time to read my article. I hope I have provided you with enough information about this amazing product.
And the final decision is yours. Good luck to you guys and see you in my next article!
You can have an opportunity to receive extra bonuses if you finish 2 steps below:
♦ Step 1: Order the product by clicking the button below

♦ Step 2: After your purchase goes through, email your receipt to me at tonyreview99@gmail.com so I can confirm your purchase and email you information about how to access to your bonus material.

